Dimer Health Telehealth Visit:
Audio/Video Setup Guide
This guide will walk Dimer Health patients through the process of enabling audio and video when joining a telehealth visit through the AthenaHealth platform.
Step-by-Step Instructions
To ensure a smooth telehealth experience, please follow these steps carefully:
Join the Telehealth Visit
- Click on the unique telehealth visit link provided to you. This link will typically be sent via sms or email.
- Once clicked, your browser will open, and you will be directed to the telehealth visit.
Select Your Audio Method
- Upon entering the meeting, you will be prompted to select an audio connection method.
- We recommend selecting "Wifi or Cellular Data" for the best experience.


Allow Microphone Permissions
- A pop-up will appear from your browser or operating system asking for permission to use your microphone.
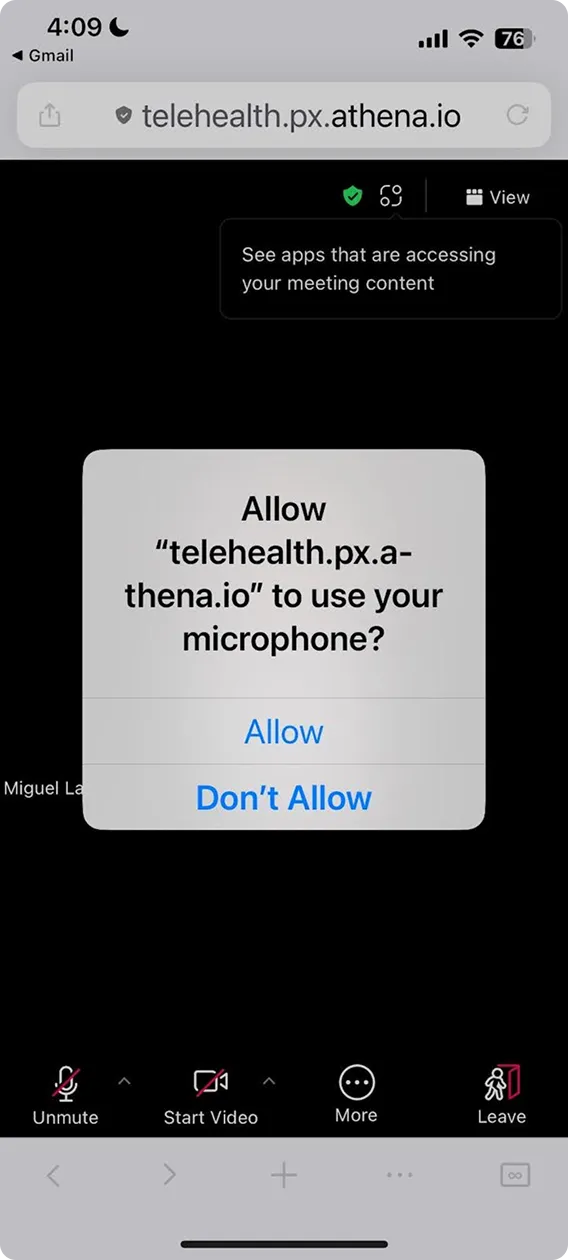
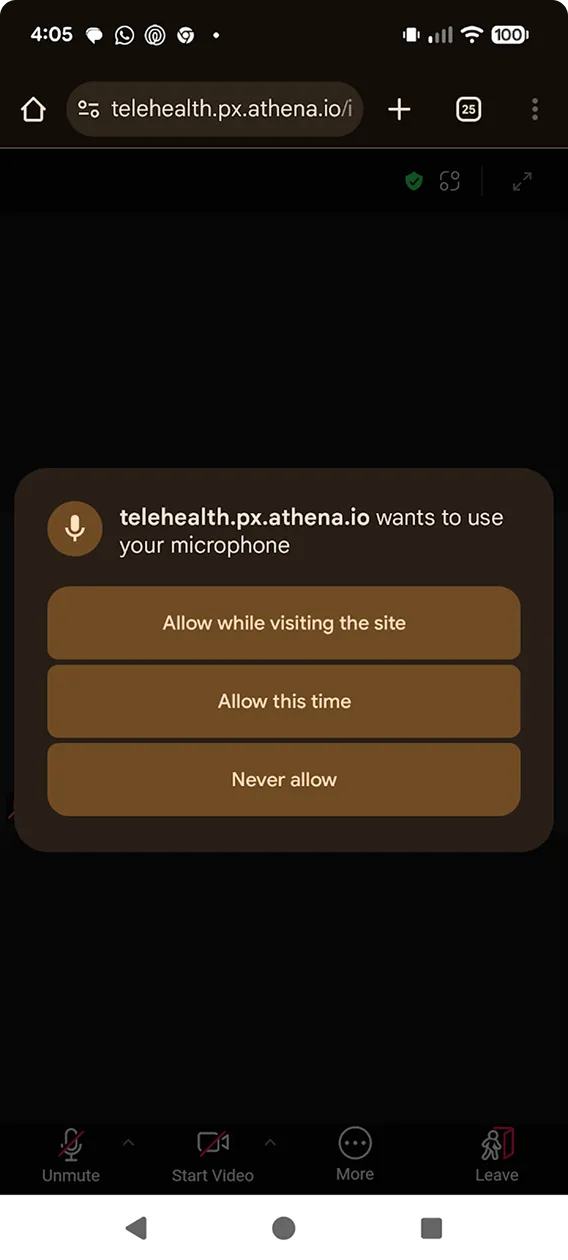
- Click "Allow" or "Allow while visiting the site" to enable your microphone. Without this, the Provider will not be able to hear you.
Enable Audio
- After granting microphone permissions, locate the microphone icon on the bottom left of your meeting screen.
- If the microphone icon has a red line through it, click on it to unmute yourself and enable your audio. The icon should then appear without a red line.
Enable Video (Part 1: Camera Permissions)
- Locate the video camera icon next to the microphone icon on the bottom left of your meeting screen.
- Click on the video camera icon.
- A pop-up from your browser or operating system will appear, requesting permission to use your camera.


- Click "Allow" or "Allow while visiting the site" to enable your camera.
Enable Video (Part 2: Final Activation)
- After allowing camera permissions, the video camera icon on your screen may still have a red line through it.
- Click the video camera icon again to activate your video feed. You should now be able to see yourself, and the doctor will be able to see you.
You are all set for the visit!
Congratulations! You have successfully enabled your audio and video. You are now ready to begin your telehealth visit with your Dimer Health provider.
Troubleshooting
If the camera or audio do not work and you see the red warning icon to their respective icons, you have not granted permission for access. The telehealth visit can not be started until permission is granted. Click on the icon with the red warning icon to grant permission.

If you encounter any additional issues during this process, please contact Dimer Health support for assistance before your scheduled appointment.

You healthy recovery deserves our immediate attention
Experience personalized, round the clock healthcare from clinical recovery experts. Until your full recovery, we’ll always be there to hold your hand.